Hi Guys
I got called on to fix a 1098 Clubman. It had been resprayed and the interior had been redone, but the car just could not be driven and it kept on over heating and struggled to stop.
The poor car had to be towed to my shop. While towing the left front wheel bearing was screaming like a pig.
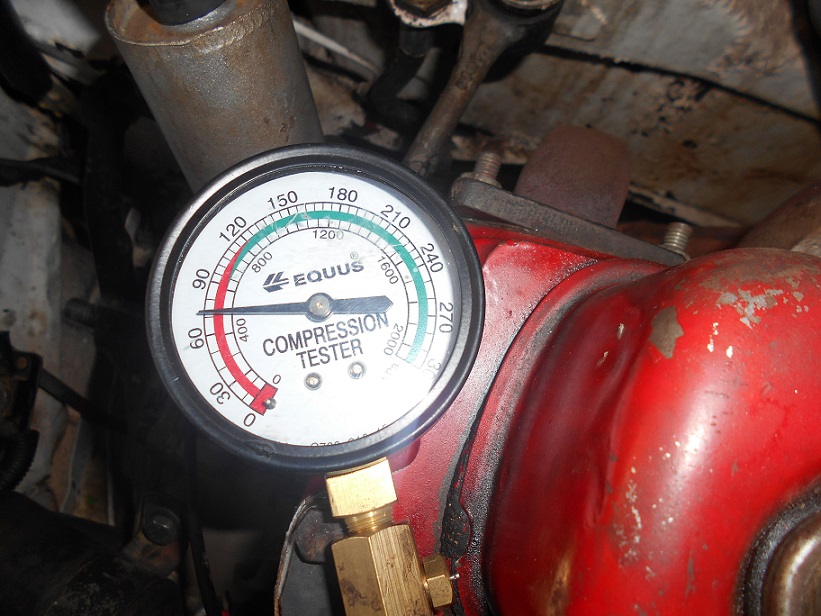
So after starting the car it smoked like a locomotive. I did a compression test and it was way down on all four cylinders. After removing the head. I found that the valves will need to be reground and the cylinder head will have to be serviced at the engineering shop.
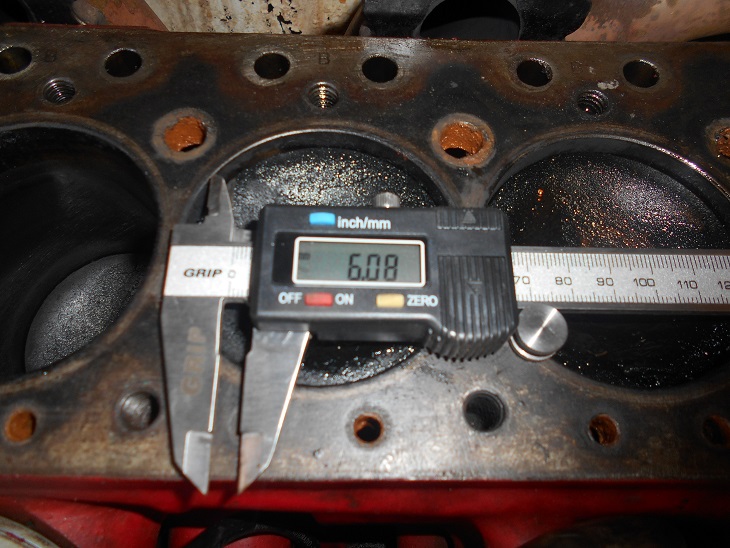
I then found that the pistons are 6mm from the top of the block instead of nearly flush (like it would normally be) when the engine is at TDC, the part number on the piston indicated that the pistons fitted is in fact 1275cc pistons instead of 1100cc pistons.
I then proceeded to remove the engine and stripped the flywheel and gearbox off the block to find that the engine is indeed fitted with an 1100cc crank and not a 1275cc crank.
Just to list some other faults found on the journey to fixing this poor car.
Threaded rod was used instead of the correct nuts and washers and studs on the inlet/exhaust mountings and on the thermostat housing.
The head stud nuts was fitted with no washers and the rocker shaft studs also had no washers fitted, thus the head could not be torqued down to the correct spec.
At various places the studs was stripped and the nuts was forced on and or stripped.
The diaphragm of the clutch was not fitted with shake proof washers, the flywheel bolt and crank pulley bolt was fitted without their lock tabs.
The valve clearances was set incorrectly.
The bottom radiator hose is joined and no thermostat was fitted to the cooling system, also only water and no anti-freeze was in the cooling system. The water pump impeller is nearly rusted off the shaft.
The engine did not have enough oil in it. The engine was covered in oil even after I used my pressure washer to wash the engine it was still badly covered. All four gaiters for the CV joints was leaking the ghries out.
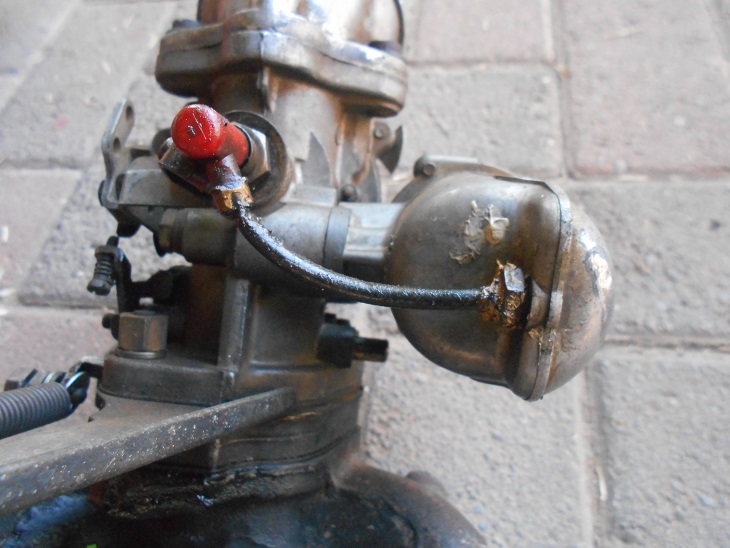
A bicycle cable was used as the throttle cable.
On the clutch the problems was numerous, the clutch arm, plunger and pushrod has been modified, bolts was used instead of the correct clevis pins to fit the clutch arm and pushrod. No locknut or clutch plunger stop was fitted to the plunger. The clutch plate is soaked in oil, due to the flywheel oil seal leaking and will have to be replaced. The flywheel and back plate will have to be balanced and machined correctly for the clutch to work properly, the throw out stop and return was not adjusted correctly.
The carburettor jet is un-usable and must be replaced, there is play in the throttle shaft and spindle, thus this must also be replaced.
The gearbox was mounted with bolts that are too short and some of them had stripped threads. The remote housing bushes was very badly worn and the rod eye is also worn past the point of being usable, that is why the gear selection was such a problem. The coupler for the gear change rod was fitted with bolts and nuts instead of the correct roll-pins.
The gaskets between the flywheel housing cover and engine seems to have been used more than once and the same goes for the gaskets between the gearbox and block. Too much gasket maker was used everywhere, on the oil feed pipe on the gearbox it was extremely bad due to the gasket maker almost blocking the oil feed hole.
The primary gear is busy disintegrating.
The steering rack boots are worn out and there is bad play in the steering rack itself. It seems like the steering shaft also has a problem where the shaft enters into the steering rack.
The Right hand ball joints are fitted without their locking tabs on the top and bottom.
The rubber cones are very badly worn on the front suspension and the ride height is severely affected. Also the lower control arm bushes and tie bar bushes must be replaced. The Right hand engine mounting did not have either of it’s two bolts and nuts fitted and was thus loose.
Both front wheel bearings are worn out very very badly. The steering was also a huge problem as the car when turned to the right after turning to the left would struggle to be corrected to the straight position again.
Due to the challenges involved in finding and using a 1275 crank, it was decided to utilize the current 1098 crank with a set of used pistons.
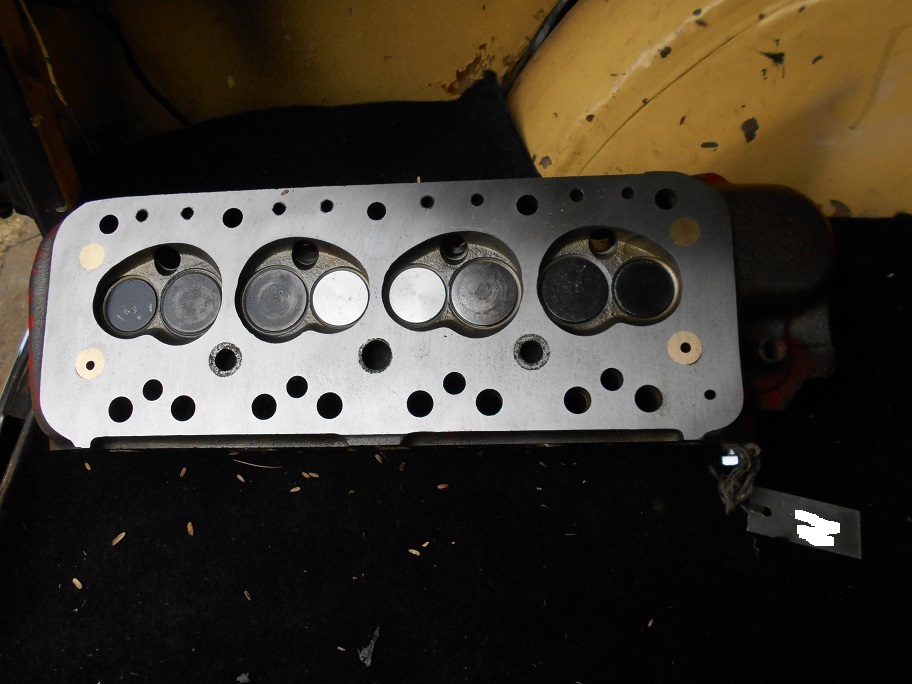
The engineering shop duly informed me that at 20 thou oversize the bores would not be usable, so I sourced a set of 30 thou pistons. Ironically the crank big end and mains was also at 30 thou. The cylinder head got serviced and needed two new exhaust valves.
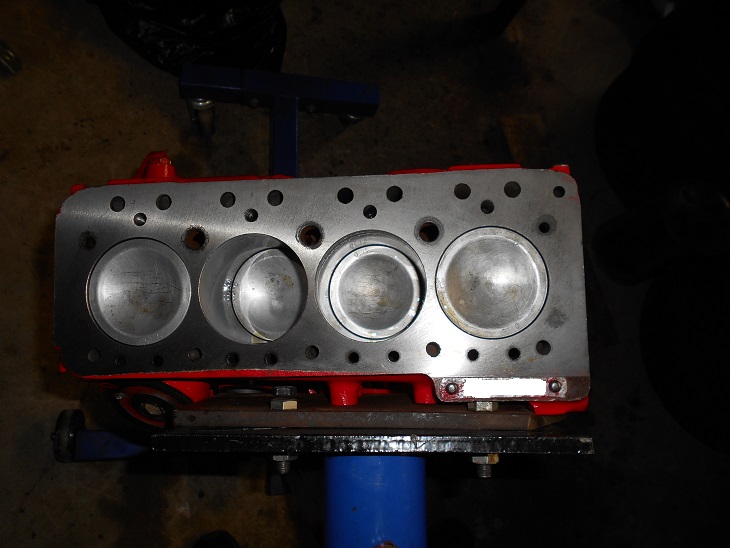
Naturally the usual items was replaced also during the engine rebuild like oil- and water pump. Timing chain and follower, cam followers etc.
I got called on to fix a 1098 Clubman. It had been resprayed and the interior had been redone, but the car just could not be driven and it kept on over heating and struggled to stop.

The poor car had to be towed to my shop. While towing the left front wheel bearing was screaming like a pig.

So after starting the car it smoked like a locomotive. I did a compression test and it was way down on all four cylinders. After removing the head. I found that the valves will need to be reground and the cylinder head will have to be serviced at the engineering shop.
I then found that the pistons are 6mm from the top of the block instead of nearly flush (like it would normally be) when the engine is at TDC, the part number on the piston indicated that the pistons fitted is in fact 1275cc pistons instead of 1100cc pistons.
I then proceeded to remove the engine and stripped the flywheel and gearbox off the block to find that the engine is indeed fitted with an 1100cc crank and not a 1275cc crank.
Just to list some other faults found on the journey to fixing this poor car.
Threaded rod was used instead of the correct nuts and washers and studs on the inlet/exhaust mountings and on the thermostat housing.
The head stud nuts was fitted with no washers and the rocker shaft studs also had no washers fitted, thus the head could not be torqued down to the correct spec.
At various places the studs was stripped and the nuts was forced on and or stripped.
The diaphragm of the clutch was not fitted with shake proof washers, the flywheel bolt and crank pulley bolt was fitted without their lock tabs.
The valve clearances was set incorrectly.
The bottom radiator hose is joined and no thermostat was fitted to the cooling system, also only water and no anti-freeze was in the cooling system. The water pump impeller is nearly rusted off the shaft.
The engine did not have enough oil in it. The engine was covered in oil even after I used my pressure washer to wash the engine it was still badly covered. All four gaiters for the CV joints was leaking the ghries out.
A bicycle cable was used as the throttle cable.
On the clutch the problems was numerous, the clutch arm, plunger and pushrod has been modified, bolts was used instead of the correct clevis pins to fit the clutch arm and pushrod. No locknut or clutch plunger stop was fitted to the plunger. The clutch plate is soaked in oil, due to the flywheel oil seal leaking and will have to be replaced. The flywheel and back plate will have to be balanced and machined correctly for the clutch to work properly, the throw out stop and return was not adjusted correctly.
The carburettor jet is un-usable and must be replaced, there is play in the throttle shaft and spindle, thus this must also be replaced.
The gearbox was mounted with bolts that are too short and some of them had stripped threads. The remote housing bushes was very badly worn and the rod eye is also worn past the point of being usable, that is why the gear selection was such a problem. The coupler for the gear change rod was fitted with bolts and nuts instead of the correct roll-pins.
The gaskets between the flywheel housing cover and engine seems to have been used more than once and the same goes for the gaskets between the gearbox and block. Too much gasket maker was used everywhere, on the oil feed pipe on the gearbox it was extremely bad due to the gasket maker almost blocking the oil feed hole.
The primary gear is busy disintegrating.
The steering rack boots are worn out and there is bad play in the steering rack itself. It seems like the steering shaft also has a problem where the shaft enters into the steering rack.
The Right hand ball joints are fitted without their locking tabs on the top and bottom.
The rubber cones are very badly worn on the front suspension and the ride height is severely affected. Also the lower control arm bushes and tie bar bushes must be replaced. The Right hand engine mounting did not have either of it’s two bolts and nuts fitted and was thus loose.
Both front wheel bearings are worn out very very badly. The steering was also a huge problem as the car when turned to the right after turning to the left would struggle to be corrected to the straight position again.
Due to the challenges involved in finding and using a 1275 crank, it was decided to utilize the current 1098 crank with a set of used pistons.
The engineering shop duly informed me that at 20 thou oversize the bores would not be usable, so I sourced a set of 30 thou pistons. Ironically the crank big end and mains was also at 30 thou. The cylinder head got serviced and needed two new exhaust valves.
Naturally the usual items was replaced also during the engine rebuild like oil- and water pump. Timing chain and follower, cam followers etc.
Own some minis, break them, fix them, improve them, test them to the limit....


![[-]](https://samini.co.za/images/collapse.png)


![[Image: XLqVNZw.jpg?1]](http://i.imgur.com/XLqVNZw.jpg?1)
