The following warnings occurred:
Warning [2] file_put_contents(): Only 0 of 13129 bytes written, possibly out of free disk space - Line: 7037 - File: inc/functions.php PHP 7.3.33 (Linux)
File Line Function
/inc/class_error.php 153 errorHandler->error
[PHP] errorHandler->error_callback
/inc/functions.php 7037 file_put_contents
/inc/init.php 187 rebuild_settings
/global.php 20 require_once
/showthread.php 28 require_once


Thread Rating:
  • 2 Vote(s) - 5 Average
  • 1
  • 2
  • 3
  • 4
  • 5
Minimad Vanden Plas
#1
My 1978 Mini Vanden Plas build.

I have lost most of my build thread on the old mini forum, but I've decided to start again.

the order of the different stages in this build will be a bit messed up due to the photos being in about 4 different locations Big Grin .


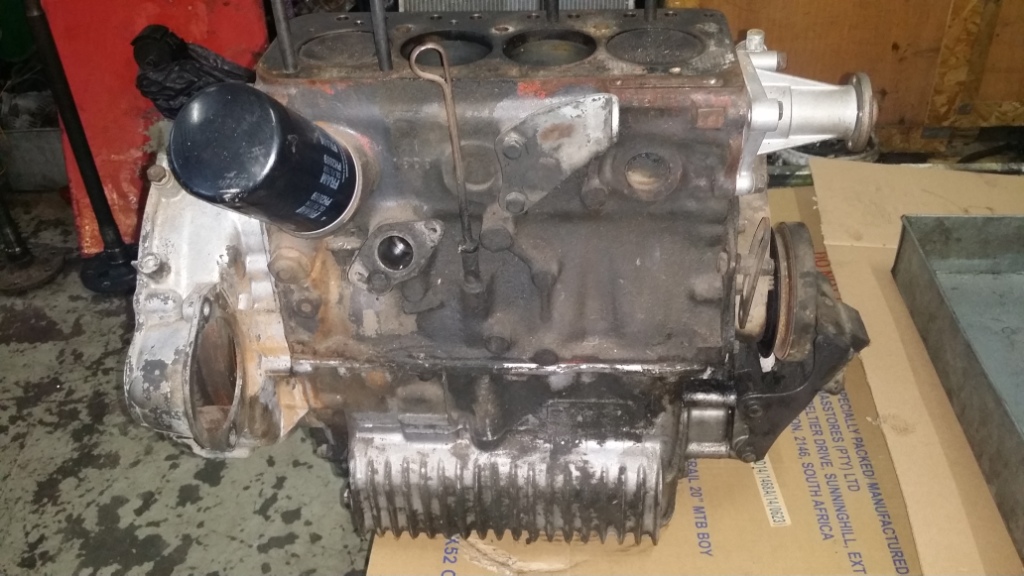
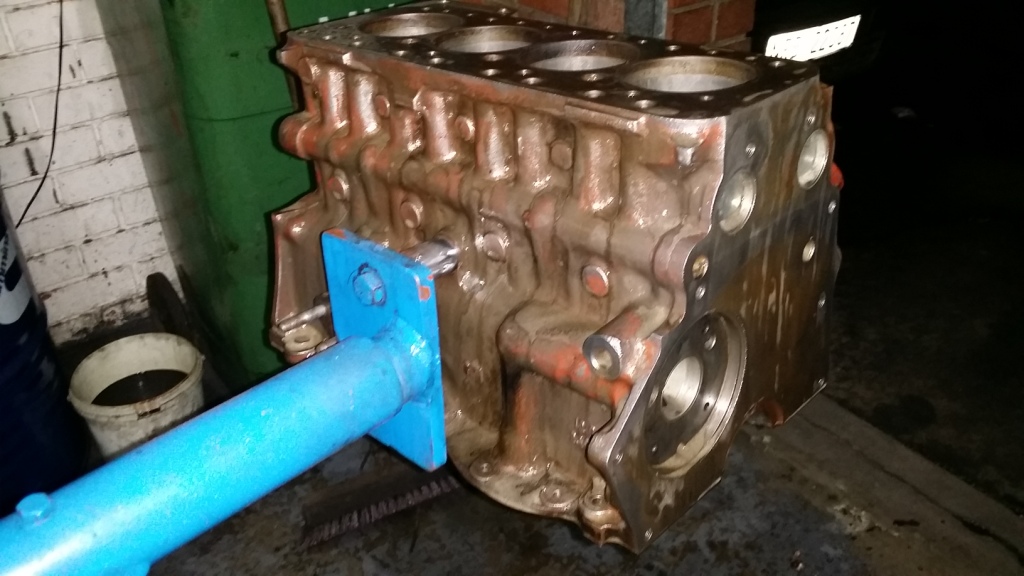
start of the engine build


engine stripped down and cleaned
Reply
#2
I've been hoping that you'd get around to redoing your build thread Krishan, your car in its present stage really does look lovely.
DodgyFOR LITTLE OLD LADIES IT AIN'TTongue
1979 GTS
Reply
#3
Sorry guys ....I just haven't had the time to update my build thread....but I hope to add all the history over the coming weekend.

With Cars In The Park just 3 weeks form now.....its been a rough 3 months trying to get all the work done in-between ordering parts from mini spares and SCC, New Wiper arm kit has not arrived in 6 weeks 
I would hate to have to put my car on a trailer to get it to the show.... Sad

currently busy with the geometric suspension kits and the rest of the cosmetic bits.

Still have some huge tasks to get to ...like the dash and gauges followed by wiring ....as will as the alarm system and central locking.

Ill try and do the posts in stages....Panel shop and body work...then Engine build .....follower buy the suspension build and finally the upholstery.   which should cover most of the stuff that has already happened....
Reply
#4
The day I picked the Vandenplas up ....pulled it with an A frame


Attached Files Image(s)
               
[-] The following 1 user Likes Minimad's post:
  • askalbert
Reply
#5
A frame works perfect .... Cool

I took the decision not to fully strip down the mini suspensions before I sent it to the paint shop so that I could keep it on it's wheel and move it around ...as space was a bit of an issue. Also....I have already build up my front and rear sub frames already, so all I need to do is drop the front and rear frames once the car is back from the paint shop....sort out the painting of the undercarriage and put the restored frames with suspension in......

going to try as much to explain the steps of the build as I post up the pictures to the best I can remember......as this build start in 2013....and is almost close to completion.

Paint Shop

Both rear window sills were replaced from a donor car.
there was no boot lid that cam with the car, so I decided to source a MK1 boot lid as I like the set-up of the number plate flap with the chrome number plate light as the bottom.

body prep stage 2

Stage 3 ...spot putt was applied to cover up most of the marks make but the 8o grit sand paper that was used to rubber down the lite weight body filler that was used to cover up the welded areas.

after that was done we did a final check on the body and sorted out any flaws that was over looked in stage 1

then the whole car was blown over with MS primer so that the fine scratches and paint chipped areas could be covered.

then another round of spot putty


Attached Files Image(s)
                                                                                       
Reply
#6
Grey primer

In my mind..... I knew that the car was going to be orange, but I wanted a twist or should I say ...flip side too the option....and after some searching on the internet.....there was this orange bakkie which inspired me to go with the colour choice...


Attached Files Image(s)
       
Reply
#7
That really is a lovely shade of orange. It is oh so shiny!
Reply
#8
So the under coat was a Scarlet chrome (aka orange) in a Duco ....we did this so that we could cover most of the grey primer and so that we wouldn't have to use to much of base coat to cover up...and also so we could get the true orange colour.

Shell was left to stand for 7 days before we cut it using some 1200 sand paper in preparation of the final paint work.


Attached Files Image(s)
           
[-] The following 3 users Like Minimad's post:
  • Grimz, Thumz, Vinay-RS
Reply
#9
These are the pearl powders that was brought in from "Paint with Pearl"in the USA. Value for money when you see what a big difference it make to the finished product.

Final coats of paint being sprayed on......

2 coats of base coat Scarlet Chrome
1 coat of clear
3 coats of pearl
3 coats of clear....to allow for "cut and polish'.


Attached Files Image(s)
           
Reply
#10
Final coat of paint going onto the car

After final coats were complete


Attached Files Image(s)
                   
[-] The following 1 user Likes Minimad's post:
  • askalbert
Reply


Forum Jump:


Users browsing this thread: 22 Guest(s)