Thread Rating:
  • 3 Vote(s) - 3.67 Average
  • 1
  • 2
  • 3
  • 4
  • 5
1978/79 GTS
#71
Out came the air chisel and other tools to remove the front end, since I have never done this, it was a great learning curve and experience.
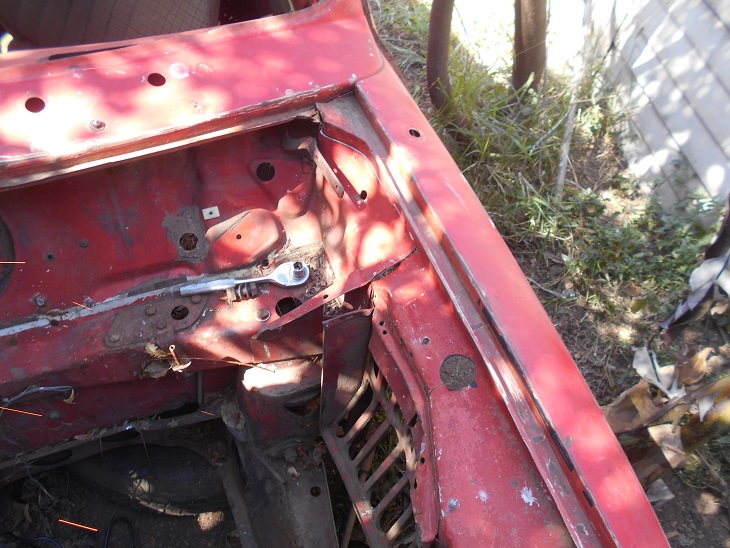


Then as if by magic ......
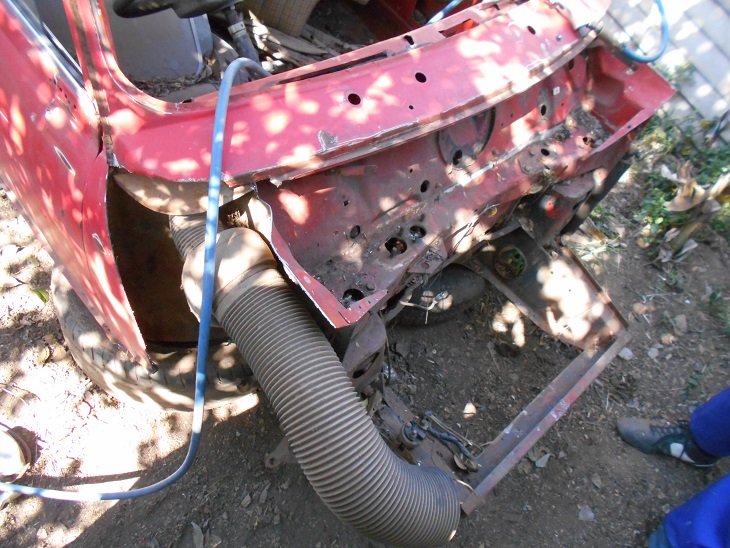


The two rear support plates for the arches was lastly removed as they will be used on the green car, whose plates have been cut smaller to fit the standard black wheel arches by previous owner, not me.

Clearly this was only the half way stripping mark as the green car's nose now had to be removed (carefully as the scuttle and A-panels will be re-used and not replaced).....

The inner panel was split from the wing on both sides then on the a-panel and lastly some clever fixer spot welded the wing to the scuttle, which is wrong.
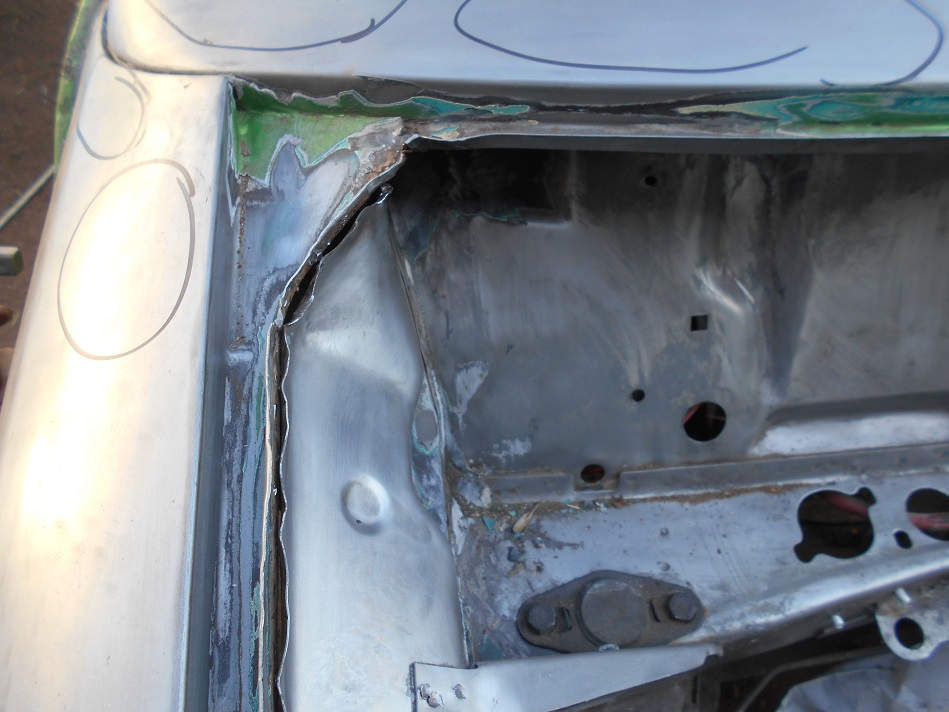


After some time and blood was spilt you end up with this.....
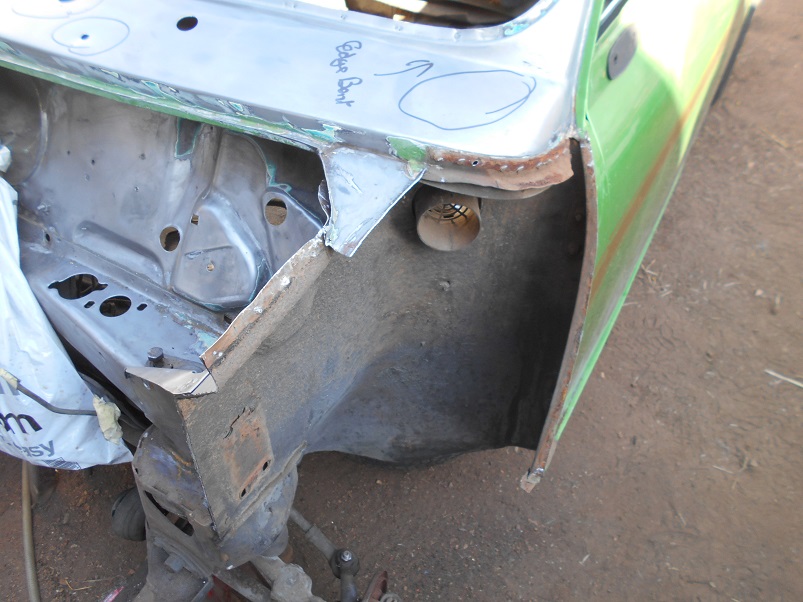


As you can clearly see the inner wing gusset was split open from the scuttle panel and that will be rectified tomorrow, before the new nose will be welded in place.


The green nose after removal.
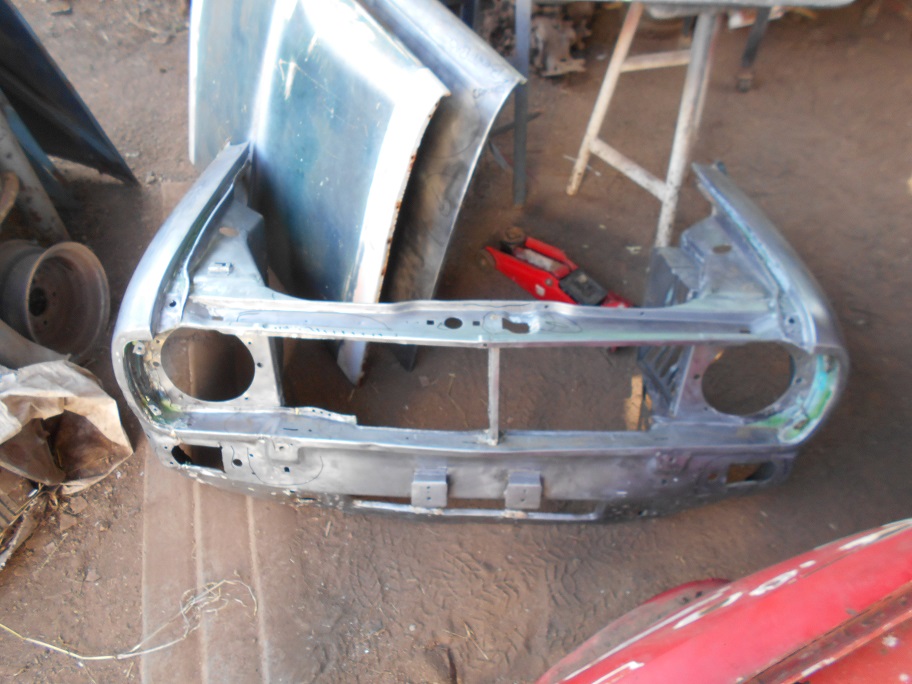
   

A fourth bonnet has been sourced which is clearly the best one to date and it will be used, or at least so I hope.

Hi Vinay

Not too long ago I asked all the relevant questions and did a lot of homework and spoke to some serious players in our game. The short answer was to have moulds made of the arches preferably on the car still ball parked at R8000 to R20 000. I tried in vain to get some partners or sponsors to do this. Then with the info and help from Andrew who is based in Aus a set of arches would have been between R4500 to R5800 depending on shipping etc.

So I took the "easy" route and was lucky enough to have sourced two GTS donor cars, the first for the interior and what I hoped was complete arches only to find the front arches had the bottom part after the joints gone. Now the second donor car is the red car above which sacrificed it's nose and three arches although they will need some serious surgery they can be re-used.
Own some minis, break them, fix them, improve them, test them to the limit....
Reply
#72
(08-09-2016, 06:50 PM)GTSPhil Wrote: THE MOTHER LOAD FOR GTS OWNERS, THE ELUSIVE WHEEL ARCHES STILL USABLE.... Blush

http://samini.co.za/attachment.php?aid=1089

Those arches could be considered mint in comparison to some that I have found over the years, progress looks to be coming along beautifully.
DodgyFOR LITTLE OLD LADIES IT AIN'TTongue
1979 GTS
Reply
#73
What's the reason for changing out the front end with another Philip?
Reply
#74
Hi Minitim

On recommendation of the panel beater that decision was made due to the following that was found....


in the pic above all the problem areas have been circled. The first below the RH headlight was a point of impact as the metal is toast there.  The area to the far right also had a knock still next to the headlight.  On the bottom valance the two central parts had broken loose and the previous panel beater brazed the parts after shortening them, which means it cannot be fixed easily.  Next up on both sides next to the indicator lights the car knocked the tow bar on my bakkie due to the eyelets breaking whilst being towed, this led to the LH and RH fender bulging, which could have been fixed.  Lastly the wheel arch extension supports had been cut shorter to fit standard black wheel arches.  Both inner wings needed attention, but on the radiator side it was quite bad.  The RED car's nose however was still in perfect nick and due to the car being a genuine GTS the wheel arch extensions was perfect.

Earlier in the week I started stripping the engine further to fit new gaskets and oil seals.

I took the timing cover to bare metal and the clutch cover and clutch cover housing also...


I had to strip the front sub-frame of all the ancillaries and ensured that it was true and straight.  We then bolted this sub-frame into the car and aligned the new nose and sure as hell it lined up perfectly.

I then got the great nice task of removing all sound deadening off all the areas on the floor pans and toeboard  panel.  Again the more you dig the more problems and work you find.  Well I am going to do this properly for once and for all no half measures will be taken....

The floor on the RH when we started.


I will draw your attention to the indentation in the floor that is no longer there due to incorrect jacking on the edge.  The circle in the centre shows where the pedal mount would normally sit, but some &%*$&# decided to fill that area with body putty and hope for the best.  The circle to the right shows a kink that ran horizontally in the footwell.  All these dents and kinks was removed with about 20 different panel beater tools, varying from dollies to a 6 pound hammer.  This work was very tiring to say the least, no wonder the last panel beater and some okes before that could just not be bothered to fix and straighten the panels properly.

The LH of the firewall with a dent that runs diagonally....


After receiving some masterful attention from the GURU... and the steering rack was removed for good measure.


The end result concerning the RH floor area, now the new floor pan actually fitted quite good, now the old floor will be removed with the knowledge that the new pan actually fits.


Own some minis, break them, fix them, improve them, test them to the limit....
Reply
#75
As I said earlier, the effort being put into the car now will make the end result something really stunning Smile
                                                                            Mk3 Full Build Thread
                                                                    [Image: XLqVNZw.jpg?1]
Reply
#76
Thanks Jared for the kind words.

Today we started with the LH floor panel and firewall area.  Problem areas high lighted.


After this we turned out attention to the steering rack mounting plate and straightened the mountings there.

Then the RH floor got the final fixing on the fire wall.

On the outer sill some rust was found right at the very front end.

When it was cut open on the inside as the new RH floor pan has already been sourced.... we found???!@@#!@$#@%@#%


The support there has completely rusted away and the drain hole was bent shut.


Out with the old rusted floorpan and the whole area got rust treated naturally and the sills too.


A good long hard look revealed that the LH floor pan should also rather just be replaced as pin holes have created havoc.
That is the next big job.
Own some minis, break them, fix them, improve them, test them to the limit....
Reply
#77
Yesterday I put in a few hours, some unforeseen events had put a hold on the built....


The RH door after being sanded down and treated with de-oxidation.


The LH door showing less re-sprays and yet original as black is first colour.

   
Own some minis, break them, fix them, improve them, test them to the limit....
Reply
#78
Today I thought would be spent fitting the nose and welding the floor, but still not yet.

One of the previous coats of paint has not had enough hardener added when it was sprayed, so the door jambs and area under the 1/4 vent windows had to be taken down to bare metal also as to ensure no reaction happens with new primer and paint.

So armed with two baby grinders I set to the task of cleaning these areas up.

First the LH area under the door step, looks very straight


Start grinding and I find some body filler, the more I grind the more filler is found?????


Finally the evil reveals itself. A huge dent    Exclamation


The rear valence getting the treatment.


Some Flintstone style and all cleaned up of old paint.  Will hopefully finalize the paint removal tomorrow and then do some welding.

   
Own some minis, break them, fix them, improve them, test them to the limit....
Reply
#79
Good going Philip. When you finish you will know exactly what you have and it will last for for the next 100 years!
Reply
#80
awesome work Phil, I like the attention to detail with the body work.

cant wait to see the end product.
Reply


Forum Jump:


Users browsing this thread: 6 Guest(s)